Search This Blog

Monday, February 4, 2019

Autonomous Database - step by step How to create db and load data into it from object store

Dear DBA's,

After performing few tasks on oracle autonomous database what i have observed is "Oracle made DBA tasks lot easier but finding jobs gonna be very tough"

No more black screen in DBA's life if autonomous rolled out in all companies. All you will get is connection to database through sql developer. You can start/stop services and backup the database through console though its automatically backup.

All the below have been covered under this post with detailed screenshots.

Provisioning Autonomous Data Warehouse Cloud
Connecting SQL Developer and Creating Tables
Loading Your Data


Oracle have really made lot easier in terms of data handling and daily routine activities in oracle autonomous database. Lets surf through the screen shots below to have more knowledge.

Below is the Dashboard as soon as you log into your account :


Lets see how to create Autonomous Data Warehouse in detail with step by step. Just click on Create Autonomous Data Warehouse.


Below is the already running instance and you can figure what are all the options will be present for an existing instance to get a better idea.


Lets create an instance. Just provide the inputs to create an autonomous data warehouse. 

In the Autonomous Data warehouse you will be getting admin user which is probably equivalent to sysdba. There wont be any credentials provided to access the server. All you have is the admin user to perform any operations in database through sqldeveloper. 


Thats it. You can see the below screenshot to see the DB provisioning is in-progress. It will not take more than 10 minutes hardly.


Once the db is provisioned you will be notified through email like below.


Thats it Autonomous Data warehouse is created.

Lets see how to load the data into your newly provisioned database.

Pre-requisites :

- All the tables must be created under the required schema inside the newly provisioned autonomous db.
- All your data from the existing db must be converted into dat files.
- Dat files can be stored in oracle object store or Amazon S3 (I am aware only these two as of now)

Lets see how to load dat files into object store.

From the menu (three lines in the left corner in the below image ) navigate into "object storage".


Name your bucket.


Upload the dat files into your bucket.


You can see the below image as dat files uploaded into object store.


Lets see how to connect newly provisioned database. Click into the database and download the credentials to connect to database like shown below.

Supply password for wallet and download the zip file.


Once you have zip file you can connect to the database through sqldeveloper.

Please refer the below image for the inputs.


connection Name : user defined

Username : admin

password : Use the one which was supplied while the db creation.

connection Type : cloud wallet ( you wont see this option in older version) Make sure you have latest sqldeveloper to connect to autonomous db.I have used 18.3.
configuration file : Select the downloaded zip file from the console.

Service ; Services will be displayed once you selected zip file.

Once you connected to the db you can create an user to load the data into db.

create user adwc_user identified by "<password>";
grant dwrole to adwc_user; --> Make sure to provide the role which all has all needed privilages.


There is an open issue due to bug "Bug 28746021 - IDCS 401 UNAUTHORIZED " which dont let you to load the data from  your IDCS account. 
We need to create an user under OCI to load the data. 


Click the user management.


Create user


Make sure you have changed the visibility into public in your bucket where all the dat files reside.

Next we need auth token to create credential inside our database in order to load the data. Get into your bucket and select the newly created user.


Click Auth tokens and generate it.


Click Auth tokens and generate it. 

Once the token is generated copy it somewhere in notepad file since we need it for the next step. 


Run the below into your database from adwc_user.

  begin
  DBMS_CLOUD.create_credential (
    credential_name => 'OBJ_STORE_CRED',   # --> User defined
    username => 'load_testoadw',  # --> New user created in OCI. refer images above.
    password => 'G3ga);tiPyHKUXMrwp42' --> Auth token
  ) ;
end;
/

Make sure the procedure is completed successfully. Use the below query to check newly created credentials.


select * from dba_credentials;

Now lets see how to load the data from dat files. Please find the below image that shows the empty table that 
created in autonomous db.


 begin
 dbms_cloud.copy_data(
    table_name =>'CHANNELS',
    credential_name =>'OBJ_STORE_CRED',
    file_uri_list =>'https://swiftobjectstorage.eu-frankfurt-1.oraclecloud.com/v1/<Tenancy_name>/load_data_testoadw/chan_v3.dat',
    format => json_object('ignoremissingcolumns' value 'true', 'removequotes' value 'true')
 );
end;
/

Below is the important to be taken care of :

https://swiftobjectstorage.eu-frankfurt-1.oraclecloud.com/v1/<Tenancy_name>/load_data_testoadw/chan_v3.dat',

ITs nothing but :

https://swiftobjectstorage.<region name>.oraclecloud.com/v1/<tenant name>/<bucket name>/<file name>


eu-frankfurt-1 --> Its my region name. make sure you updated yours.
Update the bucket name and file name too.

Look at the pic below after data loaded into autonomous db.


If you hit any error like the below :

ORA-29913: error in executing ODCIEXTTABLEOPEN callout 
ORA-06512: at "C##CLOUD$SERVICE.DBMS_CLOUD", line 860 
ORA-20401: Request failed with status 401 - https://swiftobjectstorage.eu-frankfurt-1.oraclecloud.com/v
ORA-06512: at "C##CLOUD$SERVICE.DBMS_CLOUD_INTERNAL", line 2910 
ORA-06512: at "C##CLOUD$SERVICE.DBMS_CLOUD_REQUEST", line 939 
ORA-06512: at "C##CLOUD$SERVICE.DBMS_CLOUD_REQUEST", line 667 
ORA-06512: at "C##CLOUD$SERVICE.DBMS_CLOUD_REQUEST", line 904 
ORA-06512: at "C##CLOUD$SERVICE.DBMS_CLOUD_INTERNAL", line 2883 
ORA-06512: at line 1 
ORA-06512: at "C##CLOUD$SERVICE.DBMS_CLOUD", line 835 
ORA-06512: at "C##CLOUD$SERVICE.DBMS_CLOUD", line 895 
ORA-06512: at line 2 
29913. 00000 - "error in executing %s callout" 
*Cause: The execution of the specified callout caused an error. 
*Action: Examine the error messages take appropriate action. 
   

Its purely due to authentication. Follow note id 2492544.1  if needed.

Thanks for reading my post patiently.


Monday, January 14, 2019

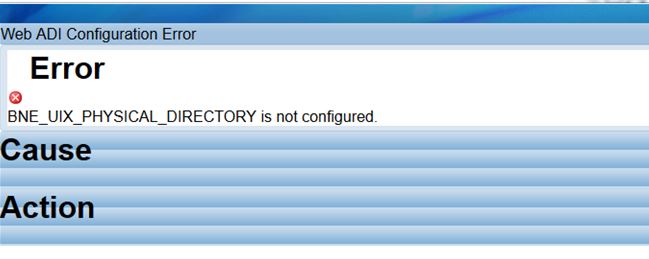
Web ADI error : BNE_UIX_PHYSICAL_DIRECTORY is not configured


Error :


Soultion :

1. Go into the responsibility: System Administrator

2. Navigate to Profile -> System -> Profile: BNE%Directory%

3. Remove any value in the profile BNE_UIX_PHYSICAL_DIRECTORY

4. Bounce the web server and retest the issue.

Perform the below If you still have the issue,

We had this issue in clone instance where production was working fine. We checked the profile option values in production and updated the corresponding values (according to clone server) in profile option "BNE%Directory%".

Ex :

Profile : BNE UIX Physical Directory 
Value :  /**/*******/apps/apps_st/comn/webapps/oacore/html/cabo


- Bounce opmn after the update. 


Tuesday, January 1, 2019

opmn/apache is exiting with status 2 in EBS R12.2

Issue :

bash-3.2$ ./adopmnctl.sh start

You are running adopmnctl.sh version 120.0.12020000.2

Starting Oracle Process Manager (OPMN) ...

adopmnctl.sh: exiting with status 2

adopmnctl.sh: check the logfile /a01/appsclone/CLONE/fs2/inst/apps/CLONE_ahqtest/logs/appl/admin/log/adopmnctl.txt for more information ...


What was found in log?

Log file :

/a01/appsclone/CLONE/fs2/FMW_Home/webtier/instances/EBS_web_CLONE_OHS1/diagnostics/logs/OPMN/opmn/opmn.log


Error found in log :

[2019-01-01T10:42:16+03:00] [opmn] [NOTIFICATION:1] [90] [ons-internal] ONS server initiated
[2019-01-01T10:42:16+03:00] [opmn] [TRACE:32] [] [internal] Host: ahqtest; Remote Port: 6233; Local Port: 6133; Pid: 15885; 11.1.1.9.0
[2019-01-01T10:42:16+03:00] [opmn] [TRACE:1] [522] [pm-internal] PM state directory exists: /a01/appsclone/CLONE/fs2/FMW_Home/webtier/instance
s/EBS_web_CLONE_OHS1/config/OPMN/opmn/states
[2019-01-01T10:42:16+03:00] [opmn] [NOTIFICATION:1] [675] [pm-internal] OPMN server ready. Request handling enabled
[2019-01-01T10:42:16+03:00] [opmn] [ERROR:1] [17] [ons-listener] 127.0.0.1;6133: BIND (Address already in use)
[2019-01-01T10:43:05+03:00] [opmn] [TRACE:32] [] [internal] ORACLE_HOME: /a01/appsclone/CLONE/fs2/FMW_Home/webtier
[2019-01-01T10:43:05+03:00] [opmn] [TRACE:32] [] [internal] ORACLE_INSTANCE: /a01/appsclone/CLONE/fs2/FMW_Home/webtier/instances/EBS_web_CLONE
_OHS1


Fix :


To resolve the issue test the following steps in a development instance and then migrate accordingly:

1. Stop all services.

2. Rename the directory: OPMN/opmn/states  (eg. /u01/EBS/1225/fs1/FMW_Home/webtier/instances/EBS_1/config/OPMN/opmn/states in the example above.)

bash-3.2$ cd -
/a01/appsclone/CLONE/fs2/FMW_Home/webtier/instances/EBS_web_CLONE_OHS1/config/OPMN/opmn

mv states states_orig
rm -rf states

3. Restart the services and confirm the error no longer occurs.

bash-3.2$ ls
instance.properties  opmn.xml_orig        states               wallet
opmn.xml             ports.prop           states_orig


bash-3.2$ ./adopmnctl.sh start

You are running adopmnctl.sh version 120.0.12020000.2

Starting Oracle Process Manager (OPMN) ...

adopmnctl.sh: exiting with status 0

adopmnctl.sh: check the logfile /a01/appsclone/CLONE/fs2/inst/apps/CLONE_ahqtest/logs/appl/admin/log/adopmnctl.txt for more information ...

bash-3.2$ ./adapcctl.sh start

You are running adapcctl.sh version 120.0.12020000.6

Starting OPMN managed Oracle HTTP Server (OHS) instance ...

adapcctl.sh: exiting with status 0

adapcctl.sh: check the logfile /a01/appsclone/CLONE/fs2/inst/apps/CLONE_ahqtest/logs/appl/admin/log/adapcctl.txt for more information ...


References :


E-Business Suite Technology Stack OPMN Process Fails To Start With Error "Check Adopmnctl.txt" (Doc ID 2174221.1)

Step by step : Oracle database 18c installation in RHEL 7 64-bit

Hello,

OS :


Red Hat Enterprise Linux 7: 3.10.0-123.el7.x86_64 or later

Oracle User Environment Configuration Checklist :

If you have an existing Oracle software installation, and you are using the same user to install this installation, then unset the following environment variables: $ORACLE_HOME,$ORA_NLS10, and $TNS_ADMIN, $ORACLE_BASE, $ORACLE_SID


Storage Checklist for Oracle Database

At least 7.5 GB for Oracle Database Enterprise Edition.
At least 7.5 GB for Oracle Database Standard Edition 2.

Minimum Operating System Resource Parameter Settings


semmsl 250

semmns 32000

semopm 100

semmni 128

shmall Greater than or equal to the value of shmmax, in pages /proc/sys/kernel/shmall

shmmax Half the size of physical memory in bytes /proc/sys/kernel/shmmax

shmmni 4096

panic_on_oops 1

file-max 6815744

aio-max-nr 1048576

ip_local_port_range Minimum: 9000

ip_local_port_range Maximum: 65500

rmem_default 262144

rmem_max 4194304

wmem_default 262144

wmem_max 1048576


Packages for Red Hat Enterprise Linux 7 : 


bc
binutils-2.23.52.0.1-12.el7.x86_64

compat-libcap1-1.10-3.el7.x86_64

compat-libstdc++-33-3.2.3-71.el7.i686

compat-libstdc++-33-3.2.3-71.el7.x86_64

glibc-2.17-36.el7.i686

glibc-2.17-36.el7.x86_64

glibc-devel-2.17-36.el7.i686

glibc-devel-2.17-36.el7.x86_64

ksh

libaio-0.3.109-9.el7.i686

libaio-0.3.109-9.el7.x86_64

libaio-devel-0.3.109-9.el7.i686

libaio-devel-0.3.109-9.el7.x86_64

libX11-1.6.0-2.1.el7.i686

libX11-1.6.0-2.1.el7.x86_64

libXau-1.0.8-2.1.el7.i686

libXau-1.0.8-2.1.el7.x86_64

libXi-1.7.2-1.el7.i686

libXi-1.7.2-1.el7.x86_64

libXtst-1.2.2-1.el7.i686

libXtst-1.2.2-1.el7.x86_64

libgcc-4.8.2-3.el7.i686

libgcc-4.8.2-3.el7.x86_64

libstdc++-4.8.2-3.el7.i686

libstdc++-4.8.2-3.el7.x86_64

libstdc++-devel-4.8.2-3.el7.i686

libstdc++-devel-4.8.2-3.el7.x86_64

libxcb-1.9-5.el7.i686

libxcb-1.9-5.el7.x86_64

make-3.82-19.el7.x86_64 make-3.82-19.el7.x86_64

nfs-utils-1.3.0-0.21.el7.x86_64 (for Oracle ACFS)

net-tools-2.0-0.17.20131004git.el7 (x86_64) (for Oracle RAC and Oracle Clusterware)

python-2.7.5-34.0.1.el7 (x86_64) (for Oracle ACFS Remote)

python-configshell-1.1.fb18-1.el7.noarch (for Oracle ACFS Remote)

python-rtslib-2.1.fb57-3.el7.noarch (for Oracle ACFS Remote)

python-six-1.9.0-2.el7.noarch (for Oracle ACFS Remote)

smartmontools-6.2-4.el7.x86_64

sysstat-10.1.5-1.el7.x86_64

targetcli-2.1.fb41-3.el7.noarch (for Oracle ACFS Remote)


Running Oracle Database Setup Wizard to Install Oracle Database


Log in as the Oracle installation owner user account (oracle) that you want to own the software binaries.

Download the Oracle Database installation image files (db_home.zip) to a directory of your choice. For example, you can download the image files to the /tmp directory.

Create the Oracle home directory and extract the image files that you have downloaded in to this Oracle home directory. For example:

$ mkdir -p /u01/app/oracle/product/18.0.0/dbhome_1

$ chgrp oinstall /u01/app/oracle/product/18.0.0/dbhome_1

$ cd /u01/app/oracle/product/18.0.0/dbhome_1

$ unzip -q /tmp/db_home.zip

From the Oracle home directory, run the runInstaller command to start the Oracle Database Setup Wizard.

$ cd /u01/app/oracle/product/18.0.0/dbhome_1

$ ./runInstaller

In the Select Configuration Option screen, select Create and configure a single instance database.

Select your installation type.


When prompted run root.sh as root user.


[root@prodapp /]# /appstier2/app/oracle/product/18.0.0/dbhome_1/root.sh
Performing root user operation.

The following environment variables are set as:
    ORACLE_OWNER= orauser
    ORACLE_HOME=  /appstier2/app/oracle/product/18.0.0/dbhome_1

Enter the full pathname of the local bin directory: [/usr/local/bin]:
   Copying dbhome to /usr/local/bin ...
   Copying oraenv to /usr/local/bin ...
   Copying coraenv to /usr/local/bin ...


Creating /etc/oratab file...
Entries will be added to the /etc/oratab file as needed by
Database Configuration Assistant when a database is created
Finished running generic part of root script.
Now product-specific root actions will be performed.


References :

Requirements for Installing Oracle Database 18c on OL7 or RHEL7 64-bit (x86-64) (Doc ID 2426806.1)

Thursday, December 6, 2018

AD Administration error: adptaskGetTaskStatusID: Error while selecting from table AD_TASK_STATUS : ORA-03114: not connected to ORACLE

Hi,

Below error encountered while generating product jar files in adadmin. We are able to perform other adadmin operations successfully except this one. After the fix we were able to run adadmin without any issue.

ERROR 
-----------------------
AD Administration error:
adptaskGetTaskStatusID: Error while selecting from table AD_TASK_STATUS

AD Administration error:
ORA-03114: not connected to ORACLE


AD Administration error:
adptaskPostpatchTiming: Error calling adptaskGetTaskStatusID()


Fix :

Check the profile for apps and system users.

SQL> SELECT profile FROM dba_users WHERE username = 'APPS';

PROFILE
------------------------------
EBS_APPS

SQL> SELECT profile FROM dba_users WHERE username = 'SYSTEM';

PROFILE
------------------------------
DEFAULT

Make sure IDLE_TIME is set to unlimited for both the profiles.

SQL> SELECT * FROM dba_profiles WHERE profile = 'EBS_APPS' and resource_name in ('IDLE_TIME','CONNECT_TIME');

PROFILE                        RESOURCE_NAME                    RESOURCE
------------------------------ -------------------------------- --------
LIMIT
----------------------------------------
EBS_APPS                       IDLE_TIME                        KERNEL
UNLIMITED

EBS_APPS                       CONNECT_TIME                     KERNEL
UNLIMITED


SQL> SELECT * FROM dba_profiles WHERE profile = 'EBS_APPS' and resource_name in ('IDLE_TIME','CONNECT_TIME');

PROFILE                        RESOURCE_NAME                    RESOURCE
------------------------------ -------------------------------- --------
LIMIT
----------------------------------------
EBS_APPS                       IDLE_TIME                        KERNEL
UNLIMITED

EBS_APPS                       CONNECT_TIME                     KERNEL
UNLIMITED

Also please check the below parameter set to TRUE in pfile.

SQL> sho parameter resource_limit;

NAME                                 TYPE        VALUE
------------------------------------ ----------- ------------------------------
resource_limit                       boolean     FALSE

For my environment it was set to FALSE and thus we were getting error while generating product jar files. 

SQL> alter system set resource_limit=TRUE scope=both;

System altered.

SQL> sho parameter resource_limit;

NAME                                 TYPE        VALUE
------------------------------------ ----------- ------------------------------
resource_limit                       boolean     TRUE

Make sure IDLE_TIME is set unlimited.

--Re-run adadmin. Fix worked perfectly for our environment.

Thanks!
Sikky


Tuesday, December 4, 2018

Enable FND : Diagnostics from backed if login page is not working in ebs r12.2

Hi,

Please find the steps below to enable trace for login page from backend if login page is inaccessible. 


FND: Diagnostics = Yes  : - 

DECLARE 
stat boolean; 
BEGIN 
dbms_output.disable; 
dbms_output.enable(100000); 
stat := FND_PROFILE.SAVE('FND_DIAGNOSTICS', 'Y', 'SITE'); 
IF stat THEN 
dbms_output.put_line( 'Stat = TRUE - profile updated' ); 
ELSE 
dbms_output.put_line( 'Stat = FALSE - profile NOT updated' ); 
END IF; 
commit; 
END; 


2> Enable debugging: 

a) Log into R12.2 middle tier and source the 'run' file system environment file. 

b) Backup file $INST_TOP/appl/admin/oacore_wls.properties 

c) Add following lines to $INST_TOP/appl/admin/oacore_wls.properties file (in all middle tiers, if needed) 

AFLOG_ENABLED=TRUE 
AFLOG_LEVEL=STATEMENT 
AFLOG_MODULE=% 
AFLOG_FILENAME=/tmp/Login.log (this is an example; just make sure that this is a writable directory) 

d) Bounce all middle tier services for change in steps #2 and #4 to take effect: 

$INST_TOP/admin/scripts/adstpall.sh 

$INST_TOP/admin/scripts/adstrtal.sh 

3> Reproduce the issue. This time you will receive "details" below the error message from the screenshot uploaded by you. 
Click on that and update the complete error message. 


Trace will be logged in "/tmp/Login.log" and you can check this file for error details.

Tuesday, November 27, 2018

Cannot identify any valid application tier nodes in ADOP_VALID_NODES table. Ensure AutoConfig has been run on all nodes.

Hello,

I got the below error while running adop and the issue has been fixed after i followed note id 2064223.1

I would suggest to read 2282694.1 also and see whether it applies to your issue. 

Error :

Initializing.
    Run Edition context  : /a01/appsclone/CLONE/fs2/inst/apps/CLONE_ahqtest/appl/admin/CLONE_ahqtest.xml
    Patch edition context: /a01/appsclone/CLONE/fs1/inst/apps/CLONE_ahqtest/appl/admin/CLONE_ahqtest.xml
*******FATAL ERROR*******
PROGRAM : (/a01/appsclone/CLONE/fs2/EBSapps/appl/ad/12.0.0/bin/adzdoptl.pl)
TIME    : Wed Nov 28 08:38:28 2018
FUNCTION: ADOP::GlobalVars::_GetMandatoryArgs [ Level 1 ]
ERRORMSG: Cannot identify any valid application tier nodes in
          ADOP_VALID_NODES table. Ensure AutoConfig has been run on all nodes.


Fix :

1. Backup the fnd_oam_context_files, fnd_nodes, and adop_valid_nodes tables, and if on AD/TXK 8 or higher; ad_nodes_config_status in the EBS env nodes:

      Linux#> sqlplus applsys/<pwd>

      SQLPlus#> create table fnd_oam_context_files_bkp as select * from fnd_oam_context_files;

      SQLPlus#> create table fnd_nodes_bk as select * from fnd_nodes;

        SQLPlus#> create table adop_valid_nodes_bk as select * from adop_valid_nodes;

      If on AD/TXK 8 or higher:

      SQLPlus#> create table ad_nodes_config_status_bk as select * from ad_nodes_config_status;


 2. Truncate the following tables (Continue from step 1):

      SQLPlus#> truncate table fnd_oam_context_files;

      SQLPlus#> truncate table fnd_nodes;

      SQLPlus#> truncate table adop_valid_nodes;

      If on AD/TXK 8 or higher:

      SQLPlus#> truncate table ad_nodes_config_status;


3.  Run AutoConfig on the DB tier:

Source the <RDBMS_ORACLE_HOME> home.

Linux#> cd <RDBMS_ORACLE_HOME>/appsutil/scripts/<SID>_<HOSTNAME>/

Linux#> ./adautocfg.sh

              ... Confirm Autoconfig completes successfully.

              ... If RAC, Repeat step 3 on all RAC nodes.


4.  Run Autoconfig on the run file system.

Linux#> source <EBS_BASE>/EBSapps.env run

Linux#> cd $ADMIN_SCRIPTS_HOME

Linux#> ./adautocfg.sh

      ... Confirm Autoconfig completes successfully.

      ... If more than one EBS node, repeat step 4 on all EBS nodes.


5.  Run Autoconfig on the patch file system

Before running Autoconfig on the patch file system the ebs_login trigger MUST be disabled
... After the successful completion of Autoconfig the ebs_login trigger MUST be re-enabled.


a. Disable the ebs_login trigger using the following SQL.

Linux#> sqlplus system/<pwd>

SQLPlus#> alter trigger ebs_logon disable;


b. At this time Run autoconfig with the patch env sourced .       

Linux#> source <EBS_BASE>/EBSapps.env patch

Linux#> cd $ADMIN_SCRIPTS_HOME

Linux#> ./adautocfg.sh

... Confirm Autoconfig completes successfully

... If more than one EBS node, repeat step 5.b on all EBS nodes.


c. Enable the ebs_login trigger using the following SQL.

Linux#> sqlplus system/<pwd>

SQLPlus#> alter trigger ebs_logon enable;


 6.  After Autoconfig has been run successfully on all nodes, run the following two (2) queries in order to verify the tables have been correctly populated:

SQL>    set pagesize 5
        set linesize 132
        col node_name format a15
        col server_id format a8
        col server_address format a15
        col platform_code format a4
        col webhost format a12
        col domain format a20
        col virtual_ip format a12

        select node_id, platform_code, support_db D, support_cp C, support_admin A, support_forms F, support_web W, node_name, server_id,
               server_address, domain, webhost, virtual_ip, status
          from fnd_nodes order by node_id;


SQL>    set pagesize 5
        set linesize 132
        col NAME format A20
        col VERSION format A12
        col PATH format A110
        col STATUS format A10

        select NAME,VERSION,PATH, STATUS from FND_OAM_CONTEXT_FILES;


After the fix i was able to run adop without any issue.


Thanks!

You cannot complete this task because one of the following events caused a loss of page data: A system failure has occurred "Front end is locked after 12.2 upgrade"

  If you have upgraded to Oracle E-Business Suite 12.2.10 Release Update Pack from Oracle E-Business Suite 12.2.6 Release Update Pack (or ea...